 |
| Primary Elements baked after powders were mixed with a tad of moisture. |
 |
| Primary Elements |
Primary Elements Pigment Powders - Surprise!
 |
| Primary Elements before baking (I did sprinkle clear embossing powder hoping to keep it sealed.) |
Primary Elements are beautiful, a little goes along way when added to a medium like water and arabic gum or a liquid polymer clay, or glaze. But, on their own, added to the surface of unbaked clay, they are unstable - meaning the colour can change if water hits, not to mention depending on the hue, the colour may alter to something you

These can be used in teeny amounts to make paint. Just add a bit to water and you will have shimmery colour to spray on paper or evenly. Let it dry, but, it still might rub off, especially once the clay is baked. But apparently adding some Arabic Gum to the water, binds it together. I am not sure if it will then stand up to Polymer clay.
As well you can have great fun, mixing it into gel mediums or glazes. They act as a binder and will stay on the surface you put it on, including already baked clay. I wouldn't use colour glaze or medium

Swatch Out Colours
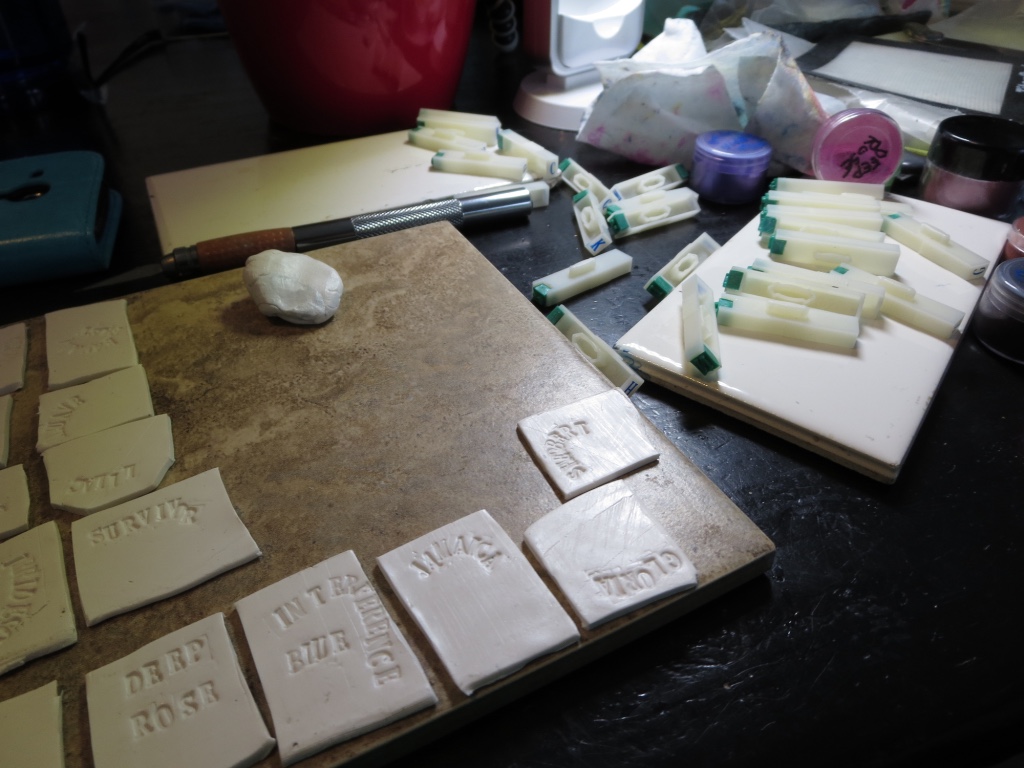
I wanted to show you how I rolled out back clay and in some cases, I used white too. You may already know that depending on the colour of the clay, the pigment and mica will have varying results. So it is worth swatch out both colours.
Using rubber letter stamps, I stamped the name of the colour into the wet clay. Cutting the sheet into sort of rectangles. Added the Primary Elements Powdered Pigment that is also mixed with mica shimmer powders. Then to get the true colour, I delicately added a bit of water and just used my fingers to mix it on the surface. Wanting it to not rub off, I sprinkled clear embossing powder on the surface. That s why a couple pics look like they have course sea salt on them!
Fired the clay at the Premo Temperature of 275F. You can use the swatches as a colour reference, attach them into a notebook or throw them into a baggie. I am not super organized :o)
Have fun, experimenting.
Note:
These Pigments are intense and therefore, will seriously stain fingers. You can purchase finger cots, or cut the fingers off of latex gloves (same thing), or thanks to Val Evans from the Unruly Housewife, you can wrap your finger in cling film.
Have fun! Experiment! Even making colour swatches is mega fun!


 |
| Baked on Primary Elements (remember with a sprinkling of clear embossing powder to seal it from making a mess) |
Subscribe! Like and Share!! (if you want of course :o)
LIKE HeArtfully Creating Here on FACEBOOK: https://www.facebook.com/HeArtfullyCreating/
HeArtfully Creating Blog:
A Bergie Creation Shop Blog: http://abergiecreation.blogspot.ca
A BERGIE CREATION - my handmade jewelry shop
Facebook:
Twitter:
YOU Tube Channel
Pinterest:
HeArtfully Creating:


No comments:
Post a Comment